Deploying to GitHub Pages using gh-pages
Effortlessly Deploy Your Static Websites to GitHub Pages with the gh-pages NPM Package.
Software Engineer
What is GitHub Pages?
GitHub Pages is a static site hosting service offered by GitHub that takes files straight from a repository on GitHub and publishes them as a website. It's designed to host your personal, organizational, or project pages directly from a GitHub repository. GitHub Pages supports static HTML, CSS, and JavaScript files, as well as Jekyll, a static site generator that converts Markdown files to HTML. The service is commonly used to host personal portfolios, project landing pages, documentation, and blogs, offering a simple way to turn code repositories into publicly accessible websites.
What is gh-pages?
gh-pages is a Node.js package that provides a simple command-line utility for publishing files to a GitHub Pages branch in your repository. It automates the process of pushing your static assets to the gh-pages branch of your GitHub repository, which is then automatically published by GitHub Pages. This package is often used in combination with site generators or build tools to simplify the deployment process for static websites or client-side web apps.
gh-pages can easily be used to automatically release and deploy any client-side rendered code. React, Angular, Svelte, plain HTML/CSS/Javascript, etc they all work!
Using gh-pages
Setup your GitHub Pages Repo
Open Terminal or Command Line: Navigate to the directory where you want to initialize a new Git repository.
Initialize Git Repository: Run the following command to initialize a new Git repository in that directory:
git initThis will create a
.gitdirectory, signaling that this directory is now under Git version control.Add Files to the Repository: You can add files to be tracked by Git with the following command:
git add .This will add all the files in the directory to the staging area. Replace the
.with specific file names if you don't want to add all files.Commit Changes: Commit these changes to the repository:
git commit -m "Initial commit"This saves your changes locally and prepares them to be pushed to a remote repository.
Create a Remote Repository: If you haven't already, create a new repository on GitHub. Do not initialize it with README, license, or
.gitignorefiles if you're planning to push an existing repository.Add Remote Repository: Back in your terminal, run the following command to link your local repository to the remote one:
git remote add origin [Your GitHub Repo URL]Replace
[Your GitHub Repo URL]with the URL of your new GitHub repository. This sets the remote, so "origin" now refers to the GitHub repository you just created.Verify Remote: You can verify that the remote URL has been added by running:
git remote -vThis should show the URL of your GitHub repository.
Setup and Configure gh-pages
- Download the gh-pages package: you can use your favorite node package manager for this step. This module requires Git >= 1.9 and Node > 14.
#NPM installation
npm install gh-pages --save-dev
# YARN install
yarn add gh-pages --dev
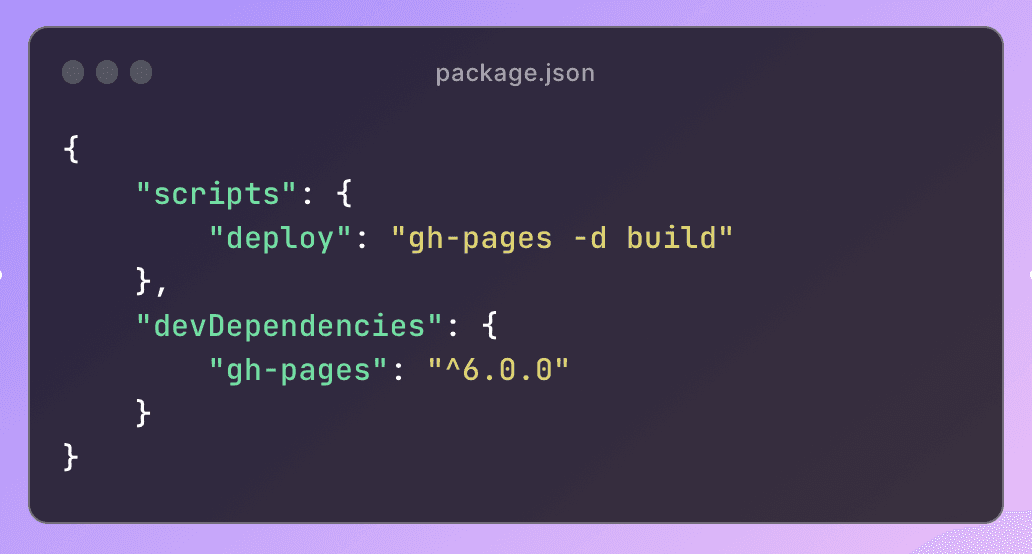
- Update your
package.jsonscripts: add apredeployanddeployscript. Thepredeploysetup handles building the static content. Thepredeployscript will automatically run when the deploy script runs.
// NPM
"scripts": {
    "predeploy": "npm run build",
    "deploy": "gh-pages -d build",
}
// YARN
"scripts": {
    "predeploy": "yarn run build",
    "deploy": "gh-pages -d build",
}
- Push the app to the GitHub repository: once again you can use your favorite package manager tool.
#NPM
npm run deploy
# YARN
yarn run deploy
- Check the GitHub repo to make sure the code was pushed to remote: gh-pages should have pushed the code to a branch named
gh-pages.
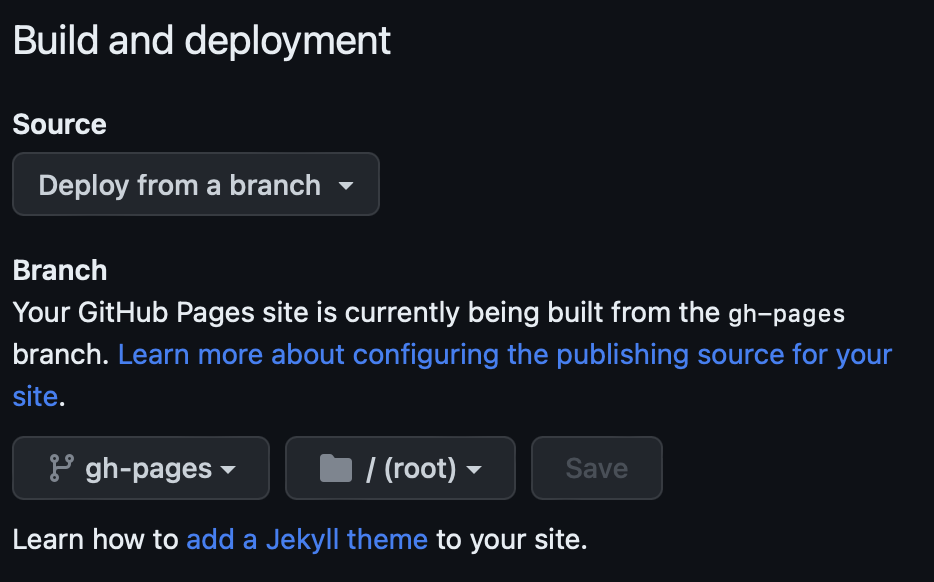
Configure GitHub Pages
Navigate to the GitHub Pages on the GitHub repository site
Configure the
Build and deploymentsettings.Source:
Deploy from a branchBranch:
gh-pagesand/(root)
I've previously written about Github Pages configurations in one of my very first blog posts. Feel free to check that out to learn more.
That's all! GitHub Actions should automatically use these configurations to take your site live to the internet.


